
Saturday, December 10, 2011
Candy Cane Deer project
I just posted the instructions and supplies for these cute reindeer candy canes, on my What's in the Box? blog. Thought I would let ya know in case you are looking for a simple, fun project to do this season.

Sunday, October 9, 2011
Our annual pumpkin catapult project
A couple years back, we purchased a catapult kit (from Rainbow Resources) for our boy, since we were covering Medieval history that year. It also happened to be the time of year when those little candy corn pumpkins were flooding the stores with their sweet goodness, and so one particular day the boy decided he wanted to see how far a candy pumpkin would go. It was then that our annual pumpkin catapult was born. So each year we now make an effort to see how far the pumpkins will go, and then add in a variety of other items to test their fly-ability too. The winner is noted to see what can break it the following year.
Mind you, this is not just play time. The boy must mark out with a tape measure, the distances and mark them (math)-then once we have the distances marked, we will (do this next week) average out each item's distance traveled (math again). We also are seeing physics and aerodynamics in play. We make predictions on which item will go the furthest (so we're calculating mass to figure this out)...and so on. Plus, it is just plain fun. We had a gorgeous day and our results were fun.

Pumpkin did the worst-but was consistent
Frog was quite the flyer actually, beating pumpkin by at least 4 ft each time
Rock, well it did pretty good-it was all over the place
Ball went fairly far but wasn't giving us the results we expected
Die was the champion hands down! It rocked the competition and the winning catapult was at 29 ft. 6 in.!
We didn't touch the tension at first-so pumpkin could have gone farther after we tightened it right? Nope. Didn't go but an inch or so farther after-interesting heh?
Once tightening the tension-things did go further.
The catapult we have cannot withstand our grueling tests-we needed to tape the bar that the catapult arm slams against-so hopefully, next year we can do this with a new one. This baby needs to retire.


And there you have it-our annual pumpkin catapult results.
Mind you, this is not just play time. The boy must mark out with a tape measure, the distances and mark them (math)-then once we have the distances marked, we will (do this next week) average out each item's distance traveled (math again). We also are seeing physics and aerodynamics in play. We make predictions on which item will go the furthest (so we're calculating mass to figure this out)...and so on. Plus, it is just plain fun. We had a gorgeous day and our results were fun.

not sure where the ball was-but these were the main contenders
Results:
Pumpkin did the worst-but was consistent
Frog was quite the flyer actually, beating pumpkin by at least 4 ft each time
Rock, well it did pretty good-it was all over the place
Ball went fairly far but wasn't giving us the results we expected
Die was the champion hands down! It rocked the competition and the winning catapult was at 29 ft. 6 in.!
Facts:
We didn't touch the tension at first-so pumpkin could have gone farther after we tightened it right? Nope. Didn't go but an inch or so farther after-interesting heh?
Once tightening the tension-things did go further.
The catapult we have cannot withstand our grueling tests-we needed to tape the bar that the catapult arm slams against-so hopefully, next year we can do this with a new one. This baby needs to retire.


I pointed out the pumpkin-I actually caught it just before it landed-cool!


And there you have it-our annual pumpkin catapult results.
Wednesday, September 28, 2011
Salt Dough Projects that really burned an impression on us

Working thru the Considering God's Creation-unit 4, we came upon this activity for the Sedimentary/Metamorphic rock lesson. I have not done salt dough projects in a long time-so after making the dough-I had to research to see how long we needed to bake these babies [this info was sadly missing from the guide]. Well, after a small fire (a hot pad fell down outta my pile I had used to pull the parchment paper/dough off the cookie sheet to cook the underside. I didn't see it when I closed the door-luckily the hubby spotted a small flame rising from the bottom of the oven) and then forgetting about it b/cuz it takes oh, 4-5 ish hours on about 212 degrees to bake it right [yes, it is easy to forget, and then hubby jacked up the oven to get ready for dinner]-we ended up with a decent (albeit slightly toasted looking) project. [sheesh!] Let's just say this is one project we won't soon forget! LOL....it is a great way to illustrate the idea of what happens with sedimentary rocks and fossils.

In case you want to try this yourself, you will need
1 cup of salt
1 cup of flour
and water to make it pliable
a cookie sheet and parchment paper if you don't want it sticking to the pan
items to make impressions
spread out to use, bake at 212-220 degrees for 4-5 hours until baked thru. Flip at least once 1/2 way thru to bake underside. I pulled the parchment paper with the goodies on it off the cookie sheet after it had baked for about 2-3 hours-it is safe to sit on the rack. Note to self: check for dropped hot pads. Cool-use for demos. :)
Tuesday, June 14, 2011
Convention Post 3: Ludy's When God Writes Your Love Story
All the information I note is available in their books. I have been using the Ludy materials for years with my kids and I can honestly say, they are some of the best. I will list (at the end of the post) the ones I have personally read and own. I must say, they are doing a great job with our youth! They are causing them to really think about what they are doing (not just in the dating arena, but what they are doing-or not-for God). Now after so many years, I have had the pleasure of hearing them speak, and am convinced that the Lord has one powerful call on their lives!
Eric spoke about how we, as Christians, [usually] will pitch our tent just past the line of demarcation [barely past the desert line] over on the Promised Land side-to then simply set up camp, and call it quits He stressed we should not quit, or settle just past that Promise Land entry. Due to the expanse being so great, we shortchange ourselves by being content with stopping there. Keep moving inside of it, toward the other side to see what God brings. Great concept actually. This would make for a great convo with your teens for sure.
He also pointed out that we should never measure ourselves with everyone around us (worldly view on things) but rather compare and measure ourselves to Christ (to go deeper into our faith and walk with him).
Now I must say, if you have never heard Eric speak-well, he has the gift of preachering (new word there) like those old timers who would set up a tent and fire up the town with their message. He is the "Love Brother Love Traveling Show" [Neil Diamond song there, in case you are wondering] kinda preacher! Seriously! He has that kind of anointing on him and it suits his personality well. He definitely is passionate about what he lectures on and teaches, and it is a nice, refreshing change. Then his lovely wife, Leslie is much more subdued and gentle. It is nice to hear them both speak during the session so you can get a change up in presentation, as well as a male and female point of view.

Leslie got into the 4 points that allow God to write your love story (and again-all of this is noted in their book with the same title). Ok, here is where it gets a bit muddled...they spoke so fast to cover the points, that I am not entirely sure which is which and if I have em right exactly. Suffice it to say, I am slightly guessing but it sounds right (if my ole brain can recollect right).
Point 1: Give God your pen. IF you try to write your love story-it will come out a mess and can lead to well-nothing good. (my words not hers) [Eric popped back into the chat with this ditty]...When God comes knocking we only let him in the front hall and a few rooms. We need to allow him in all of our rooms, even the locked ones-so that He can lead our lives-not the other way around. He noted that most of us cannot trust God because we cannot see His heart but by doing so-He can get into all the areas of our heart to make them ready.
Point 2: Build your life around Jesus Christ. I think that goes without saying.
Point 3: Live in an Act of Faithfulness. Be single in your mindset-that yes you are taken but not with a dude or chick-but with Christ himself. Live as you should-with a pure heart and mind. Not to be a "somebody" or attract attention of the opposite sex. I will save my opinion and preachering on this for another post someday (I am totally agreeing with them on this, in case you are wondering-and have brought our kiddos up to follow this point).
Point 4: Draft a Winning Team. Use your mom and dad to help you along in your story. Have a good relationship with them. See their assistance not as a pain but rather as a blessing-esp. since mom and dad may have some inside info/feelings that you the prospective bride/groom doesn't. You know you are in a Godly story when your relationship pulls you closer to God/Jesus Christ instead of farther away. Use your mentors and such too-but (I don't recall if they said this exactly but it is a good way to live) always check your spirit (not your heart b/cuz it can be deceived) against the Word. This is one that you will have to work on (mom and dad) to help build that bridge of trust and respect. Being overly involved to the other spectrum of taking a vacation to the moon, in regard to your child's life/love story, will not work-find the middle ground. Pray for clarity and wisdom.
Also-they touched on the fact that -we (mom and dad) need to be praying not only for our children, but our children's future spouses! How awesome is that!? God is so amazing and wants nothing but the very best for our kiddos-including our children's spouses! :)
When God Writes Your Love Story
When Dreams Come True
When God Writes Your Life Story
When Dreams Come True
Authentic Beauty
Set Apart Femininity
God's Gift to Women
Teaching True Love to a Sex at 13 Generation (this one is for the folks more than teens)
Bravehearted Gospel (new-still reading)
Wrestling Prayer (new-still reading)
Eric spoke about how we, as Christians, [usually] will pitch our tent just past the line of demarcation [barely past the desert line] over on the Promised Land side-to then simply set up camp, and call it quits He stressed we should not quit, or settle just past that Promise Land entry. Due to the expanse being so great, we shortchange ourselves by being content with stopping there. Keep moving inside of it, toward the other side to see what God brings. Great concept actually. This would make for a great convo with your teens for sure.
He also pointed out that we should never measure ourselves with everyone around us (worldly view on things) but rather compare and measure ourselves to Christ (to go deeper into our faith and walk with him).
Now I must say, if you have never heard Eric speak-well, he has the gift of preachering (new word there) like those old timers who would set up a tent and fire up the town with their message. He is the "Love Brother Love Traveling Show" [Neil Diamond song there, in case you are wondering] kinda preacher! Seriously! He has that kind of anointing on him and it suits his personality well. He definitely is passionate about what he lectures on and teaches, and it is a nice, refreshing change. Then his lovely wife, Leslie is much more subdued and gentle. It is nice to hear them both speak during the session so you can get a change up in presentation, as well as a male and female point of view.
Point 1: Give God your pen. IF you try to write your love story-it will come out a mess and can lead to well-nothing good. (my words not hers) [Eric popped back into the chat with this ditty]...When God comes knocking we only let him in the front hall and a few rooms. We need to allow him in all of our rooms, even the locked ones-so that He can lead our lives-not the other way around. He noted that most of us cannot trust God because we cannot see His heart but by doing so-He can get into all the areas of our heart to make them ready.
Point 2: Build your life around Jesus Christ. I think that goes without saying.
Point 3: Live in an Act of Faithfulness. Be single in your mindset-that yes you are taken but not with a dude or chick-but with Christ himself. Live as you should-with a pure heart and mind. Not to be a "somebody" or attract attention of the opposite sex. I will save my opinion and preachering on this for another post someday (I am totally agreeing with them on this, in case you are wondering-and have brought our kiddos up to follow this point).
Point 4: Draft a Winning Team. Use your mom and dad to help you along in your story. Have a good relationship with them. See their assistance not as a pain but rather as a blessing-esp. since mom and dad may have some inside info/feelings that you the prospective bride/groom doesn't. You know you are in a Godly story when your relationship pulls you closer to God/Jesus Christ instead of farther away. Use your mentors and such too-but (I don't recall if they said this exactly but it is a good way to live) always check your spirit (not your heart b/cuz it can be deceived) against the Word. This is one that you will have to work on (mom and dad) to help build that bridge of trust and respect. Being overly involved to the other spectrum of taking a vacation to the moon, in regard to your child's life/love story, will not work-find the middle ground. Pray for clarity and wisdom.
Also-they touched on the fact that -we (mom and dad) need to be praying not only for our children, but our children's future spouses! How awesome is that!? God is so amazing and wants nothing but the very best for our kiddos-including our children's spouses! :)
Ludy Books we use/have read and recommend:
When God Writes Your Love Story
When Dreams Come True
When God Writes Your Life Story
When Dreams Come True
Authentic Beauty
Set Apart Femininity
God's Gift to Women
Teaching True Love to a Sex at 13 Generation (this one is for the folks more than teens)
Bravehearted Gospel (new-still reading)
Wrestling Prayer (new-still reading)
Friday, June 3, 2011
Convention Post 3: Generations Past, Present and Future by James Muffett
**Please keep in mind that I am going by my notes and may not have it all 100% correct as stated, altho I am pretty sure I have the gist of it correctly. You will need to decide if what is penned here agrees to your family's beliefs or not.
This session focused on how we need to be aware of future generations as we are focusing on every day life. How our actions will directly change (for the better or worse) the lives of our children, their children and their children (and so on).

Mr. Muffett is the founder and president of the Student Statesmanship Institute, which is a wonderful program meant to teach our children all about government, how bills become a law and so forth. How it is vital that they become, and stay involved to help make changes in our laws, for the betterment of our state and country. My two oldest did the summer program a few years back and truly learned a lot (not to mention they had fun and made a lot of new friends). If you are in Michigan or one of the surrounding states, this is a worth while program to look into.
As the session progressed, Mr. Muffett stressed how God requires us to be story tellers, to teach our children about Him and his Word and our very history [lest we fall away..sounds like today's world doesn't it?] by using Deuteronomy 32:7 as confirmation of this-
This session focused on how we need to be aware of future generations as we are focusing on every day life. How our actions will directly change (for the better or worse) the lives of our children, their children and their children (and so on).
Mr. Muffett is the founder and president of the Student Statesmanship Institute, which is a wonderful program meant to teach our children all about government, how bills become a law and so forth. How it is vital that they become, and stay involved to help make changes in our laws, for the betterment of our state and country. My two oldest did the summer program a few years back and truly learned a lot (not to mention they had fun and made a lot of new friends). If you are in Michigan or one of the surrounding states, this is a worth while program to look into.
As the session progressed, Mr. Muffett stressed how God requires us to be story tellers, to teach our children about Him and his Word and our very history [lest we fall away..sounds like today's world doesn't it?] by using Deuteronomy 32:7 as confirmation of this-
Remember the days of old;
consider the generations long past.
Ask your father and he will tell you,
your elders, and they will explain to you.
But what kind of legacy are we leaving our children? Are we teaching them the foundational basis of our country's beginning-based on God not man? We should be raising a generation that is not afraid to shine and be the light of the world. We have forgotten to look at our past with gratitude [well not all of it is worthy of that but most is-was until corruption set in and God became a passing fancy]. The genealogical, spiritual and cultural heritages we have been given all have molded and set precedence to where we (our country) are today.
The most thought provoking moment was when he highlighted Aleksandr Solzhenitsyn's* statement....
"To destroy a people you must first sever them from their roots."
Which is exactly what the undercurrent is in our country right now-the removal of God in our laws and the very fiber of our nation as we once knew it to be.
All is not lost though, if we forge through the wilderness and teach our children the truth of our past (that many have attempted, and unfotunately succeeded at removing from our children's history lessons, or as Mr. Muffett noted-"huge chunks" of it) by using primary source documents as resources and other books which acknowledge the Truth.
Suggested texts:
The Light and the Glory by Peter Marshall
The Pilgrims Progress by John Bunyan
America's Providential History
by Mark Beliles and Stephen McDowell
*I do not believe Mr. Muffett agrees with or would care to promote much of what this man had to say about things. He simply found this statement to be most appropriate for his lecture. Now, I know not of this Aleksandr Solzhenitsyn except what I quickly scanned off of Wikipedia. I can say from what I did read about him, I honestly don't agree with much of what he touted. But I do agree-as Mr. Sozhenitsyn correctly reconfirmed, (after studying and researching why Russia had so many great disasters and hearing the old timers explanation for this) that "Men have forgotten God, that is why all this has happened." [resource: Wikipedia.com]
I wonder too, if that is why America has seen such a downward trend in all that is good and right. I suspect it to be so. You simply cannot remove the Lord from the very essence of a country without disastrous results.
Obviously, this session gave my daughter and I some food for thought! I hope these bullet points also cause you to research this some more as it certainly worthy of pursuing. If you ever have the opportunity to hear Mr. Muffett speak-do so, as you will learn a lot!
Beautiful Feet Books Early American, US and World History Guides, All American History I and II from Bright Ideas Press . I haven't used Sonlight [younger grades-we have the 20th Century World one that does touch on some AM. history, but it's been a while since I have gone thru it and I am not so sure how well it highlights the beginning of our nation as following God first...] or My Father's World histories for American studies, but am sure they follow suit and do teach it as HIStory. If you have used those and can comment regarding them-please do so. If I missed some, also leave a comment so others can find those curriculum programs that do stress GOD as our foundation. Thanks.
I suggest the following
history programs that do teach the truth:
Beautiful Feet Books Early American, US and World History Guides, All American History I and II from Bright Ideas Press . I haven't used Sonlight [younger grades-we have the 20th Century World one that does touch on some AM. history, but it's been a while since I have gone thru it and I am not so sure how well it highlights the beginning of our nation as following God first...] or My Father's World histories for American studies, but am sure they follow suit and do teach it as HIStory. If you have used those and can comment regarding them-please do so. If I missed some, also leave a comment so others can find those curriculum programs that do stress GOD as our foundation. Thanks.
Thursday, May 26, 2011
Convention Post 2: Help for the Distractible Child: Birth thru Primary Grades Session

I purchased this book from their vendor set up. I am about 2/3 thru.
This is an insight behind the beginning of their mission/company
and discusses the challenges of having a distractible child,
and ways to help minimize the behaviors. And after hearing her speak,
I am not surprised that this is punctuated throughout with Melinda's humor.
Helpful insight for anyone dealing with these issues.

The Distractible Child-part I
birth - elementary age
Speaker: Melinda Boring
(degree in Education, and Masters in Speech Language Pathology)
I actually was able to talk with Melinda and her hubby, Scott prior to this session. I wanted to be sure to introduce myself because I had reviewed some items of theirs for the TOS review crew (love the Heads Up! Frames they sent). I am thankful for those because they help my son stay on the line he is reading [and not skip around] as well as help target areas I want him to focus on. For more info on them, you can read that review here. These folks are wonderful. It was clear that they truly want to help other families and it shows thru their kindness. If you ever have the opportunity to hear them speak or visit their vendor booth at a convention-do so. I also know that Melinda wrote an article for the Special Needs Planner for TOS-which is especially designed to address SN issues.
I knew the minute she started this lecture that it was going to be a fun and informative one. Melinda spent some time highlighting life at the Boring homestead (which is far from boring) and then dove into some ways to help eliminate or at the very least, minimize the distractions that cause the child to not focus or putz thru their work-making the school day drag on and on. I am considering applying some of these techniques to my lovely hubby because if he were in school today-he'd definitely be labeled as unable to sit and focus without being distracted. I noticed a few things I also do-so I guess we now know the apples did not fall far from the tree. :)
I will highlight some of the lecture for you, but it certainly isn't all of it. Her book is a great source for ideas and their website has the goodies she suggests.
Tips for the learning environment:
- Keep everything off the work area (this is for those that seem to find anything and everything grabbing their attention)
- Allow for controlled movements (I am thinking this is where the little do-dads come into play-they can select one to a couple items that they can manipulate while working. Such as a squeeze ball or wind up critter [like the frog I bought] or a stetchy man or the Wikki-Stix) something that allows for a release of their energy without them bouncing off the walls themselves.
- Avoid cluttered worksheets or reading assignments (she blocked off areas with paper that was not written on and left only open the area she wanted her son/daughter to read. Clever. It meant he read only that little area and his eyes were not overwhelmed with the other business on the page)
- Use contrast (so put the worksheet/assignment on top of a colored piece of paper [folders, larger paper that is colored] to outline or frame the worksheet. I should think at least a 1/2" border or more would suffice in getting their attention. Kinda like a frame for a picture except the frame is bright and the picture is the paper they working on).
- Have a reminder weight on them (for her daughter, they made a kitty that was filled with sand [now gravel] that weighed enough to help "hold her down". I am thinking this is a good idea for those kids that "fall out of their chairs" or get up constantly and may not even know why-esp. when they are not done working on their assignment/project. She said to have it on their lap about 20 mins. and then take it off for 20 then if need be put back on and so forth. That way they don't get too accustomed to the weight which would make it ineffective). Visit their site and take a look at their weighted kitty and turtles. I picked one up at the vendor booth and they do weigh more than I thought-so these are serious stay in your seat critters. We have a real kitty that does take over one's lap so I think we have this covered in our home. But if I see we need one-well I now know a good solution to fixing it.
Tips for Structuring Time:
- Predict time needed (this is done with a timer. If your child gets distracted by the noise of the ticking, then use a timer that is silent [which they sell])
- Give assignments one at a time
- Provide feedback in a timely manner
- check with the child frequently during tasks (this may not always be possible tho)
- Reward attention (this is the positive approach-mention how well they are working and whatnot instead of always noticing what they are not doing)
HERE IS WHERE WORKBOXES will be a HUGE blessing to you. They met just about everything she mentioned as a help. They have all the stuff they need in the box so the child won't get distracted and become "lost" looking for a pencil or a glue stick b/cuz it will be right there for them. The assignments are in small slices and they only do one box at a time-so they know how much they need to do and what it is they are to do. They can see where they are at in their day of assignments and know that when they finish the last box, they are done. These have changed the way we do school and I even have an entire blog dedicated to ideas/helps and how to use them. You can visit my What's in the Box? blog to get more insight regarding this awesome method of organizing and streamlining your schooling.
General Tips:
- Use auditory signals to get their attention (I do this and never even realized I was-LOL. Use a sound of a bell or whistle or clap to get them to get back on track)
- For fidgeters: using the little toys that keep their hands busy will help redirect their attention. She mentioned something that I have noticed a lot in my life-that many adults will jingle their keys (or snap the pen or the like) and that is because they are in need of fidgeting to focus (my words not hers but you get the idea). Wouldn't cha know-just the other day at the doctor's office a guy came in and was constantly jingling his pocket change/keys (I wanted so badly to go to the guy and give him a busy item like a flour balloon**). LOL Maybe I should carry around several of those goodies to give adults, so they will have a less noisy item to fuss with!
- Use novelty, props or storytelling to help promote their focus and attention (her daughter enjoyed getting her stuffed critters together to re-enact a story or lesson, which I am sure she would then remember much better than if she was staring at some words on a page).
- Allow child to draw or be busy whilst the teacher is speaking/reading (I HAVE to use this technique with my kids all the time-always. My dd draws and my son will color, play with something or build with legos/toys or literally be rolling on the floor or walking around the coffee table whilst I read/instruct. They DO retain better when they are moving/fidgeting and I stand by this recommendation whole heartedly!)
- Take a picture of say the toy area all cleaned up proper like. Then have that picture handy and say to the child that you want them to clean up and make the area look "like the picture" (this is a Waldorf method idea and is effective-esp. for visual learners).
**flour balloon is a high quality balloon filled with flour and then tied off. The child can squeeze and squash this to release their energy. I made one at home using a funnel and flour. Altho it isn't as big as theirs, it works. There are those squeeze balls that do the same job too.
And that wraps up this lecture. There are so many easy, little ways you can help your child-so don't despair. It is possible and it can help all of you have a smoother, less stressful day.
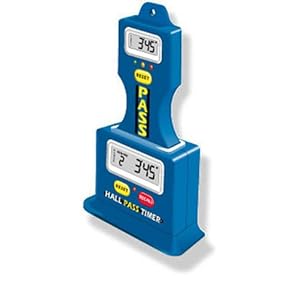 Oh, I wanted to mention that they have this hall pass timer thing I am seriously considering. It has two parts-one for the child (or husband who disappears whilst on a mission for ya) and the base. You program in the allotted time (up to 5 mins) and then it starts timing them when you turn it on. The base keeps track of the time too and supposedly, it will keep going [until the removable part is put back in] so you know just how much past the 5 mins. they are "late". This is a visual reminder that they have to move it to get the errand done to then quickly get back to "headquarters" to finish their work. Thinking of all the times I see my kids disappear to "go find something" or "check on something" during our mini breaks-which then becomes a lengthy vacation for them- I am so thinking this would help us out a lot. You may need one for your family too. :0)
Convention Post 1: Dyslexia: Neurodevelopmental Causes Session
First off, the INCH convention (held in Lansing, MI) was set up where you could attend one of the 12 options available during each time period. So after the General Session in the morning-there were 4 periods of classes to attend. The 4 started after lunch and ended prior to dinner. On Friday, the closing General Session was at 7 (and in this case, included recognition of graduates too) Now anyone who graduated this year and wanted to walk on stage/have their name read and have the fam look on could do this. It was more of a gesture or official way to end the journey, it was not where they received their diplomas-which was the family's responsibility and to be done at home. I am not sure what my take is on this...I guess for us it is not a priority...but some folks, esp. their family members "need" to see something like this, it is a way to accomplish the look of a formal graduation And some kids want to experience that type of event-so hey, whatever floats your boat. We chose to not attend the closing session. I was pooped and my ankle was swelling up-but I bought the Keynote speaker's Cd to listen to later. So this all started Friday, and ended on Sat. afternoon. I am penning the sessions as I attended them. Some may sound mighty familiar b/cuz they were given by the same speaker (just a wee bit different topic). I will also highlight the General Sessions in their own posts.

Disclaimer: I am detailing this stuff from my notes and info I received at the session-I cannot guarantee the accuracy. Research the material on the site and speak to them if you need more clarity and help.
Three of our four children have some form or another of Dyslexia-so this lecture caught my eye immediately. I wasn't so sure if it would go anywhere when the speaker first started, she seemed a bit shaky and I honestly almost got up and left. I am glad I didn't. She offered some insight as to how the brain works and what is going on when dyslexia is involved. She also mentioned several ways to work with the student to help them. I was going to stop by there booth and get a free booklet on how to do the hearing stuff, but totally didn't find them/forgot. But I did write down some ideas and helps. There are some articles on their site worth reading and you can contact them too (helps if you are in their area-check their Members by State icon/page to see if anyone is certified by you).
Basically-the goal is to get the child to use one side for all their methods of inputting information. So if you have a right handed child-you want them using their right ear/eye to collect the data so the brain isn't getting switched around when it receives it (hence dyslexic tendencies). Problem is-many will be right handed, but use their left eye more or their left ear more and that is when the issues arise.
She passed out a worksheet to check off issues your child had. So on one-I could check off that my son reverses letters or groups of letters-then scan to the right and see that means mixed-dominance issues. Ah, this I suspected for a long time and when I think back to when he was a baby-he used both hands almost equally-so perhaps this is where it became an issue-no hand seemed to "take over" which means he became interdependent on both (I am that way too). [I will see if I can scan that and get the info uploaded for you to see-] Another example on the sheet is "Does your child read slowly?" (that would be a yes) so that shows possible visual issues, mixed dominance, low auditory processing, eye tracking issues. Is he all of those? I don't think so -but it helps point toward some possible issues.
Anyway-after going thru the sheet she moved on to ways to help change the dominance or improve the skill.
Hand the child a camera, Kaleidescope, paper towel tube or rolled up paper (I used the toy pirate telescope thingy) and watch which hand they pick it up with and which eye they use to look thru it. That should be there dominate hand/eye...but I am thinking one should do this a couple times, esp. if they pick it up the next time with the other hand and use the other eye. I guess that would definitely show a mixed dominance.
To check their hearing dominance: stand behind them and ask them to keep their head straight until you say something (she suggested holding up a sheet of paper and then speaking behind it) -watching to see which way they turn their head. Also-ask them to pick up a phone (play or real) and see which ear they put it to initially to answer it; or give them a large sea shell and tell them to listen to the ocean sounds in it. That will tell you their dominant ear.
If they are using the opposite eye/ear than their hand-you know there is an issue.
Up first: Session on Dyslexia
given by Stephanie Lankhorst who is certified by the
*they work with kids that have all sorts of issues, not just dyslexia
so if you have an ADD, DS, autistic, etc. child,
it would be worth investigating them
Disclaimer: I am detailing this stuff from my notes and info I received at the session-I cannot guarantee the accuracy. Research the material on the site and speak to them if you need more clarity and help.
Three of our four children have some form or another of Dyslexia-so this lecture caught my eye immediately. I wasn't so sure if it would go anywhere when the speaker first started, she seemed a bit shaky and I honestly almost got up and left. I am glad I didn't. She offered some insight as to how the brain works and what is going on when dyslexia is involved. She also mentioned several ways to work with the student to help them. I was going to stop by there booth and get a free booklet on how to do the hearing stuff, but totally didn't find them/forgot. But I did write down some ideas and helps. There are some articles on their site worth reading and you can contact them too (helps if you are in their area-check their Members by State icon/page to see if anyone is certified by you).
Basically-the goal is to get the child to use one side for all their methods of inputting information. So if you have a right handed child-you want them using their right ear/eye to collect the data so the brain isn't getting switched around when it receives it (hence dyslexic tendencies). Problem is-many will be right handed, but use their left eye more or their left ear more and that is when the issues arise.
She passed out a worksheet to check off issues your child had. So on one-I could check off that my son reverses letters or groups of letters-then scan to the right and see that means mixed-dominance issues. Ah, this I suspected for a long time and when I think back to when he was a baby-he used both hands almost equally-so perhaps this is where it became an issue-no hand seemed to "take over" which means he became interdependent on both (I am that way too). [I will see if I can scan that and get the info uploaded for you to see-] Another example on the sheet is "Does your child read slowly?" (that would be a yes) so that shows possible visual issues, mixed dominance, low auditory processing, eye tracking issues. Is he all of those? I don't think so -but it helps point toward some possible issues.
Anyway-after going thru the sheet she moved on to ways to help change the dominance or improve the skill.
To check dominance:
Hand the child a camera, Kaleidescope, paper towel tube or rolled up paper (I used the toy pirate telescope thingy) and watch which hand they pick it up with and which eye they use to look thru it. That should be there dominate hand/eye...but I am thinking one should do this a couple times, esp. if they pick it up the next time with the other hand and use the other eye. I guess that would definitely show a mixed dominance.
To check their hearing dominance: stand behind them and ask them to keep their head straight until you say something (she suggested holding up a sheet of paper and then speaking behind it) -watching to see which way they turn their head. Also-ask them to pick up a phone (play or real) and see which ear they put it to initially to answer it; or give them a large sea shell and tell them to listen to the ocean sounds in it. That will tell you their dominant ear.
If they are using the opposite eye/ear than their hand-you know there is an issue.
Ways to help improve correct use (same side):
Army crawl 2x a day for approx. 3 min. each set.
(this works to help vision issues. I didn't write down what she meant by central vision issues but I know not being able to correctly copy something that is written is one clue they may struggle with it. I wish I could remember what she said were some of the other signs but alas-I cannot...sorry.)
Pinhole glasses 15 mins. per day while using computer or watching TV
I think you can buy them thru them or on line..not sure really
These are for those children struggling with central vision issues
Flashlight w/penny taped or glued over light bulb (center)
2 mins. per day (so as many times as you can get on each eye during that time)
3 seconds on eye 10 seconds off-alternating the eyes as you go
so 3/10 on right, 3/10 on left, back to right and so on
(She said you would cover their other eye with your hand while you are flashing the light in the other-I believe this is meant to get the center eye focus)
Changing eye dominance via an eye patch or cheap glasses
I didn't note a time frame here but bet that if
they will be reading for a reasonable amt of time
(maybe 20 or more mins.)
that using the patch/glasses while doing so, will help
train the correct eye to become stronger.
The eye you do not want them to use is blurred out (she used clear nail polish on the lens). One could also use that clear contact paper (maybe a couple layers) on the lens of a cheap pair of glasses-or if your child has prescription glasses, then the contact paper would be a better idea since you only want to do this for a while each day and can take it off without ruining them. I bet the dollar stores and even Wal-Mart/Target have those glasses that are for reading (I haven't looked yet, but there has to be some that don't change the focus much). Or even sunglasses, where you pop out the eye you want them to use and keep the dark lens in the other eye and maybe darken it a bit more. This would have to be done for some time, but it is meant to get the weaker correct eye to now become the dominant one.
To change hearing dominance:
Like I mentioned, I forgot to get that brochure which I am sure had a great list of ideas-but what she mentioned was the swimmer's ear plugs and just put it in the ear you don't want them using (2 hrs per day) to help get the correct side to become dominant.
That was basically it-time ran out. I believe the folks will test/evaluate and then you can go from there, but if no one is near you or you cannot afford the program-then at least these little helps noted above should assist in lessoning the issues for your child.
Wednesday, May 25, 2011
Goodies we purchased at convention
Like any good convention goer, we had to walk away with some goodies-and we did. I didn't find a few things I had wanted to preview and possibly purchase, so I have to just order them later. I also still have to figure out a couple things regarding our history. But for the most part, with my previous buys from used sources, and my vast collection of curricula already, I won't need to get much more. The only thing not pictured here is the Abeka math I ordered for the boy. Sad to say, the vendors simply did not have the merchandise like they used to. Many vendors I had hoped would be there were missing and those that were, well-many are not what I need. Rainbow Resources did not have as much as they used to carry either.
 One of my favorite FIAR books is the Another Celebrated Dancing Bear, which is about impossible to get thru our library-so I caved and bought a beautiful hardback edition (not too spency-I think it was about $15ish) and I also bought a few new Berenstain Bear books too. My daughter bbsits these little dudes who LOVE the stories, but after going through our rather large collection a zillion times, she was hoping I would get a few new ones-which I did. I love them. I think my kids have all read the ones in our set at least a zillion times too.
The diving sub is a little gift for the boy. Plans changed and he couldn't come, so I bought him this. We have the volcano and now the sub (so of course he went right to experimenting with them when I got home)-cheap entertainment for sure. My daughter bought that popcorn pen-which really does smell like it. When she was using it during the sessions, folks kept looking around for the source of the popcorny smell-too funny. And I decided to try those crayons for the white boards (the pens seem to never come off or make a mess when we clean it) and they work pretty good. You have to rub a bit harder to get it off the board, but won't stain it up like the markers. So that was a fun find. Oh, and the cinnamon covered almonds were delish and never made it past an hour or so of buying them. That is our tradition when we go-buying warm, toasty cinnamon nuggets of awesomeness. :0)
 The second day-I just couldn't decide on a couple things-so I felt it best to not get them right now. I can always order them later. So I didn't get much the second (or was it 5th time thru) around the vendor hall. The little frog and timer are from Heads Up Now! The gray and red color pencils and erasers we actually bought in an art store in downtown Lansing. We seem to always be shy of the deep red and gray colors, so I was happy to be able to buy some. I also ordered the CDs of the three main speaker sessions. Very good stuff-which I want my hubby to listen to and then I will also lend em out-too good to not share! The Ludy's and Voddie Baucham were excellent speakers. Gained some new nuggets of wisdom and thoughts to ponder (I will highlight the sessions in separate posts later).
I did have the opportunity to stop by the Heads Up Now! booth and introduce myself. I ended up chatting with Melinda and Scott Boring quite a bit. Very, very lovely couple...so if they are at your convention-be sure to stop by and say hi to them and check out their wonderful gadgets that help highly distract-able kids. I bought her book too-and am enjoying reading it. I actually reviewed their reading frames for TOS. Melinda had some great sessions (I was only able to attend one) and I learned some great new ideas for keeping the kiddos focused and on task without losing my mind or voice! Oh, and Melinda told me she wrote an article about special needs in the current Special Needs TOS planner-so if you own it, or are looking to get it-look for her article too.
Those are our goodies from convention. Look for the individual posts regarding the different sessions I went to soon-they were awesome! I also have more pics of the time with my dear daughter, but have to use the other 'puter cuz this one doesn't have the tools I need to fix red eye and to flip them....so those will be coming soon too.
First day shopping finds

The diving sub is a little gift for the boy. Plans changed and he couldn't come, so I bought him this. We have the volcano and now the sub (so of course he went right to experimenting with them when I got home)-cheap entertainment for sure. My daughter bought that popcorn pen-which really does smell like it. When she was using it during the sessions, folks kept looking around for the source of the popcorny smell-too funny. And I decided to try those crayons for the white boards (the pens seem to never come off or make a mess when we clean it) and they work pretty good. You have to rub a bit harder to get it off the board, but won't stain it up like the markers. So that was a fun find. Oh, and the cinnamon covered almonds were delish and never made it past an hour or so of buying them. That is our tradition when we go-buying warm, toasty cinnamon nuggets of awesomeness. :0)

I did have the opportunity to stop by the Heads Up Now! booth and introduce myself. I ended up chatting with Melinda and Scott Boring quite a bit. Very, very lovely couple...so if they are at your convention-be sure to stop by and say hi to them and check out their wonderful gadgets that help highly distract-able kids. I bought her book too-and am enjoying reading it. I actually reviewed their reading frames for TOS. Melinda had some great sessions (I was only able to attend one) and I learned some great new ideas for keeping the kiddos focused and on task without losing my mind or voice! Oh, and Melinda told me she wrote an article about special needs in the current Special Needs TOS planner-so if you own it, or are looking to get it-look for her article too.
Those are our goodies from convention. Look for the individual posts regarding the different sessions I went to soon-they were awesome! I also have more pics of the time with my dear daughter, but have to use the other 'puter cuz this one doesn't have the tools I need to fix red eye and to flip them....so those will be coming soon too.
Saturday, May 21, 2011
Back from Convention
I am dog tired and will get to the convention nitty-gritty soon (hopefully)....but thought I would leave you with one of those quips like David Letterman would do: top 10 kinda thing or "you know you are _______ by..."
yah...
so being that this is a Christian convention (altho you don't have to be to attend) they do a little "warm up" with some singing of some Christian songs-well the power point or whatever you call it was not working quite right this morn, at first..so they just dug in and belted em out....cept they forgot something....not all churches sing the new music that is so popular nowadays-leaving some of us sitting there looking pretty stupid/lame or just looking like we were refusing to sing but...here is the real issue...[at least for my daughter and I]
You know you are an old timey Lutheran when everyone about you is singing some new fangled Christian music that you have never heard (nor most likely ever will in church) before and haven't a clue as to what it is or what the words are.
And there you have it-my "top of the morning to ya" convention experience. I breathed a sigh of relief when the words came up on screen and then they sang some I actually knew. Whew.
**if you are wondering-we usually attend the service with Traditional music-so we could prob'ly belt out the oldies and most of the attendees this morn would have sat there scratching their heads. 17th, or 18th century hymn [old German like]-oh yea. New music that is all fresh and alive-not so much. They do offer a service a couple times per month with hip new music, but it is the late service and we usually are long gone by then. I also do have some music on my iPod "wanna be" MP3 player, that I listen to and love-but not all that stuff...and I simply don't listen to music enough to know this stuff. So yes, there you have it.
Wednesday, May 4, 2011
Water Color Project instructions
I just copied/pasted my pal's instructions. I am hoping I put the right pictures with the steps, to help you see what it should do-but folks, I am kinda guessing, so please forgive me on that. :0)
Just go for whatever happens -happens here-esp. if it is your first attempt. I actually cut down to size, some left over white board (from Home Depot-the stuff I used for our white board in the classroom) but anything that is slightly larger than the paper size, and is hard enough to not absorb water, will do. We used painters tape to seal around the edges. About 1/2 inch or so around the edges-keep it tight or it will bleed, losing that nice edging. The rest of course, will stick to the board. Try not to move the boards if possible. Otherwise, wait until they are dry before doing so. Otherwise, paints will run, plastic wrap will pop off and so forth.
1. There are 3 main kinds of watercolor paper -- rough, cold press and hot press (smooth) -- we used rough. As for the paper-it is expensive-we just purchased out right from Michaels and tore them into 6 pieces each. If you only have a few students-obviously, you can have larger papers.
Arches brand is the best and you can get books (called blocks-so you won't need a board then) .. like this... http://www.dickblick.com/products/arches-watercolor-blocks/ -- it is glued down on all 4 sides so you have a flat surface that doesn't move until you cut it off the block.
2. Using painters tape, tape paper down to a solid surface (example white erase board) not cardboard.
3. Have plenty of water, watercolors (cheap Crayola works fine) and a "good" paint brush that holds water (not one that comes with the Crayola paints), and a rag or paper towel
4. You will need some leaves-real or fake to use on the day they trace. Variety is good!
5. You will also need a pencil, saran wrap, reg. table salt, a couple Q-Tips and Rubbing Alcohol. Oh and an old toothbrush if doing the spatter technique.

Steps to paint the picture:
1. Paint the whole blank paper with water, with a big brush drip yellow and blue and red (primary colors) onto the paper. This is called WET ON WET painting. The colors will blend on their own, if there is enough water and fill the page. Let dry with out working on it.

Here you can see the various early stages....
2. Trace leaves "artfully" across your dry painting. We used artificial ones of various sizes and shapes.


You can see the red, yellow, blue bleeding in the background,
the sketching of the leaves there and the saran wrap.
Actually the purple leaf has the rubbing alcohol affect on it too.
3. Pick a leaf outline and paint it with water then with paint, again this is WET ON WET painting. You can try part of the leaf yellow and part red = if there is enough water and paint the colors will blend and make orange. Do other leaves that DO NOT touch. You can also try WET ON DRY -- leave the leaf outline dry and paint on it with just wet paints. These will not blend, they will stay the exact colors you pick. Let dry.

Saran Wrap look.
4. Now that everything is dry again... pick another leaf and do WET ON WET again -- take a small piece of plastic wrap (Sranwrap) and place it on the leaf while still wet. Do not crinkle it up too much but it should have lines and over laps on it. Do not push down on it either, it will push the paint and water out of the leaf outline. Let it dry with the wrap on it. When it is dry you can peel off the wrap and it will look like a crinkled leaf.

Red leaf has the Rubbing Alcohol technique, the light blue and purple ones
also appear to have the Saran Wrap look.
5. Pick another leaf that has everything around it dry and do another WET ON WET (use fun fall colors like green, yellow, orange, red, brown) and then use a Q-tip and rubbing alcohol. Dip the Q-tip in the alcohol and dot the leaf. Let it dry. It will look like a bug was eating the leaf or cool mold was taking over.

6. After all leaves are painted there are a couple of other techniques that you can play with. You can use a toothbrush and splatter wet paint on dry paper. You can add a new layer of paint to an already painted leaf that you think needs more color. Try not to over work your picture, watercolor should flow like water.

Notice the spattered look this student got from using the toothbrush. Very nice.

This one shows the salting results quite nicely.
Be sure there is plenty enough water on it to absorb the salt-
not enough, the salt will just stick.
7. When all leaves are done the negative space needs a wonderful dark wash. We used a beautiful dark blue with some people adding a touch of purple or green (depending on if they had lots of purple leaves -- they added green, or green leaves -- they added purple). Remember to use lots of water and it should be WET ON WET again to get it to flow and blend. While it is still wet take a pinch or 3 or 4 and scatter it over the "water" let it dry with the salt on it. The salt will move the paint and water out of the way in a fun star-like way.

Nice mix of the techniques on this beauty.
8. Once you are all done and it is dry, take off the tape and look at your painting. Notice how the different layers (or washes) show through. That first step of yellow, red and blue can be seen in interesting places, like where the salt moved the water. Or where a leaf has a sunny hue under it but is painted green too. Figure out which side is up and make sure you sign and date your work.

This is a very young 4 yr olds. So even the little guys can make a keepsake!
Be proud of your hard work and patience. It is amazing how everyone can use the same instructions and they all look so individual and unique! Remember to not worry about "mistakes" after it is all done and you look at the whole picture it looks like you wanted it to do that and it wasn't a mistake after all!

Another 4 yr old's-quite impressive~
Here is a good website to see some more watercolor techniques... http://www.watercolorpainting.com/watercolor-tutorials.htm

Darker background choice on this one-bleeding, salt
and Rubbing Alcohol show up nicely on this one.

Good leaf color changes, outlines and leaf variance
(and my boy is color blind so he cannot even appreciate
some of these dark colors, esp. the deep purple
and grays-but still not too shabby!)
There you have it-our co-op kids' works of art! I will post the stray student's pic once I get it-she was absent that last day.
Be sure to frame your beautiful pieces of art too!
Tuesday, April 19, 2011
Easter Craft-mini bunnies

Now, Easter is my fav. holiday/biblical celebration, and we know full well that it isn't about bunnies and chocolates and plastic eggs. But it is fun to create a few crafts that scream "spring" and this is one of them. If you don't like to mix bunnies with your Easter celebration, this would still be a fun craft for spring or when you study bunnies/animals and what not.
You will need to do the following to make your bunnies:

*1/2 and 1/2 or small milk containers-one per child (rinse and rinse and then do a final rinse with a touch of bleach in the water to kill any milk and smell that may remain-let dry completely)
*stapler (staple close the opening you pour the milk from. I waited until I cut the ears/sides out to make it easier to get that area cut out-but you can do this first if you wish)


*Sharpie pen to mark out the ears and sides to cut along (I did this and even cut it out-saves time and it is not that important for the kids to do). They should take up the better part of the top, you can trim it down a bit so the ears don't touch (b/cuz the cotton fuzz will)-stop at the fold near the pouring area.


*scissors and a sharp pointed cutter to start the ears. I cut the ears out first, then did the side trim.

*hole puncher-make a hole in the middle of the top rim of the container. This is where you will pull the whiskers thru. I actually had the kids put the pipe cleaners thru before gluing. I had 2 pipe cleaners per bunny, but it is up to you. You can use pipe cleaner or yarn or whatever you have that looks like whiskers.

Yes, have the kids wear old clothes: glue, fuzzies and reg. boys gone crazy junk
will get all over their shirts.
*Pink paper for the middle of the ears. Cut out smaller than ear size but it doesn't need to be perfect, the cotton will cover a lot of it. Glue on the ears in the middle of them.
*glue, a container for it and paint brushes. It is simply easier to "paint" the glue on the box than squeeze it on.


*Cotton balls. I had a bag of 100 and I have plenty left (we did 2) so hopefully, that will help you judge the amt you need [1/3 bag or so was left over]. Have the child glue the sides, add cotton balls and keep going until the outside of the bunny is filled in nicely. We tore the balls into smaller pieces for the ears (front) and to fill in spaces. I suggest packing them in good on the facial area, esp. around the pipe cleaners. Pack them in tight to hold those in place and puff up the face as they wish with layers. Glue a big puff on the rump for the tail. We glued/cotton balled the back of the ears down a bit and my ds also did one row on the insides. You will stuff the center with Easter grass, so you don't need to be too worried if it is plain on the insides.
*add googly eyes, and a pom-pom nose (or you could use a button, paper, etc.) and your bunny is ready to go. Let it dry good though, before adding grass and placing on your table. Stuff with grass and add some eggs/goodies to finish it off.


Hippity Hoppity Easter is on its way.
Friday, April 15, 2011
6 Step Water Color art project
For one of our co-op classes, the kids worked on a 6 step water color project. I have the exact directions listed in this post. They turned out beautiful!
Using watercolors, a series of steps, saran wrap, salt, rubbing alcohol, and lots of water-plus a black pen for outlining-this is what we got and I cannot wait to frame and display these beauties!

 close up of dd's-salt is the white splashes, round dots-I believe is rubbing alcohol...have to check tho
close up of the saran wrap leaf-it is suppose to leave these marks-dd's didn't work right-probably b/cuz we had to move them to dry (due to having done this at the church we had our co-op at, and we couldn't leave them out).
Using watercolors, a series of steps, saran wrap, salt, rubbing alcohol, and lots of water-plus a black pen for outlining-this is what we got and I cannot wait to frame and display these beauties!

Final results are striking. DD's is horizontal, DS's is vertical


Thursday, April 7, 2011
A great hsing moment-kinda wordy but well worth it
So invariably, there comes a time in a young student's life when he just cannot be bothered with "schooling" you see, and is much too busy with thoughts of toys, playing a game on the computer and/or other boy thoughts (like busting loose from his mother's staring green eyes as she tilts her head in the manner that means nothing other than serious business)....
So here we are having another one of "those" weeks. Things are getting done on a smaller scale than the head mistress is wanting and 'tudes are teetering one step below "this shalt earn some discipling if it continues" ...so as we gathered the day previous, to settle into our usual meeting place (the couch) to listen to the story of the day (Matchlock Gun) for our history lesson-this little "AH gottcha" moment occurred. Fear not newbies to hsing, these days will come and for those who haven't seen one of these in so long you are beginning to believe it is merely an old wives tale....hang tight, as it will happen again and when it does-your heart will sing!
Walk with me down this memory lane, if you please. Mother is seated and poised to vocalize this story to a boy who not only will be interested in the subject matter, but most likely will "eat it up" due to the boy theme, gun toting and adventure loving moments. She calls said student over to hear this enrapturing story (OK, I may be stretching it but hey I can peal out a story like a fine trained story weaver if need be~ and I needed to be spot on this day). Head Mistress waits and calls again-perhaps student's ears are full of wax and he simply didn't hear the request (even tho he was but a mere 15 ft away, in the same room). Request reverberates across the room, this time with a sternness that indicates punishment may soon follow, if not met quickly. Student bemoans the entire 15 ft walk to meeting place, asking "why" and "how long". Head Mistress is confused, after all of the books we have been reading of late (minus the Chronicles of Narnia) this one meets and exceeds this student's awesome factor list. Mother Mistress beckons child to her side and promises-just 3 chapters then.
![The Matchlock Gun [MATCHLOCK GUN] [Paperback]](https://lh3.googleusercontent.com/blogger_img_proxy/AEn0k_sp2t6vmH9jMScijlgcwrxi7K5LKV-x-0ScatcYkFEZTG_pUnJqmLO_3YF6yvuWxWSTUr_HXpqUmZa2ywqWHGp0cT94qm-ETLpwJiuk7yyGWAlgO474sYt8Rgg-nMepbwA2eNs7MA=s0-d)
The book (acquired from library not so nearby, seemingly unopened and never read-the HORROR) is cracked open and the intro read. Boy asks how long this will take. Mother dear chokes back a rhetorical statement that would probably be followed by tears (hers not his), and chose to simply ignore rude comment. Mother reads and completes the intro, looks up triumphantly to see twisted face of student (as though his skin is being pricked by a million quills from a porky porcupine)....she pushes on.
First chapter brought mild interest, a bit of confusion until the page with the Matchlock gun is displayed. Hmm, he has seen those on historical shows/at museums. Interest peaks slightly. Mother moves to chapter 2...mind you in pure story telling splendor with voice inflections that would make a professional ooo and ahh in delight. Mother is pouring it on thicker than a chilled maple syrup. Suddenly, a student of despair speaks out (wiggly, distracted and just about to spring from his "imprisonment" if not released soon)..."Are we done yet?"
Mother dear has had it. Insulted perhaps too. "What is so important that you cannot sit for 15-20 mins to hear this wonderful boy story?"
Guilt flashes over boy's face, "Forget it." is heard and mother says, "OK fine, just one more chapter. You will survive."
The third chapter begins to wind down, mother's voice growing dry and raw from the dramatic inflectional reading skills-she too wants this misery to end. Deflated and sad that that she somehow misread the student's love of such things, she looks at puppy dog eyed boy and says just a couple pages left. But here is where that moment occurs. The MOMENT educators across the globe yearn for....
But wait! What is this dear reader? Could it be?
Perhaps due to Mother Mistress's distress, she doesn't notice that the boy has snuggled deeper into her side, and that he genuinely has become "drawn into the story". Then Mother finishes last sentence in chapter 3.
About to shut the book, to go find some water and chocolate to drown her deflated self in-the boy loudly protests. DID you catch that dear reader? He asked, no begged, to have another chapter read. Trying to not alarm child with a major "WHOOHHHOOO", mother dear quickly records this event into her memory scrapbook, deep within her mind.
Then another chapter comes to an end and the request stands, with a flourishing, "Let's just finish it."
WHOA there. That is what we call the "moment", where the child begs for something they originally thought they had no need to hear/learn or partake in. Ah joy. He did like it [Mother isn't so off the target after all]-the fleshy desire to not want to "do school" because he had other intentions, was flipped over to "I want to hear it all."
Mother Dear and Student Once Protester melted into one cuddly, learning bundle of sweetness. Boy walks away having stated he really enjoyed the story, that he really liked the gun, and how the boy was able to fire it. And how scary it would be to do it, but he'd have been brave and done it. Ah. Ah and ah again.
These moments do exist and they do increase in frequency. Mother Mistress' mistake was to start the day way too late...and boy's mistake was to think he could balk his way out of a lesson. Fight for those moments dear reader, they are worth it.
And there is my great homeschooling moment of the week. It's been a good week indeed.
**and Mother did get that water to replenish her wasteland dry throat from reading the entire book, and that chocolate too.
So here we are having another one of "those" weeks. Things are getting done on a smaller scale than the head mistress is wanting and 'tudes are teetering one step below "this shalt earn some discipling if it continues" ...so as we gathered the day previous, to settle into our usual meeting place (the couch) to listen to the story of the day (Matchlock Gun) for our history lesson-this little "AH gottcha" moment occurred. Fear not newbies to hsing, these days will come and for those who haven't seen one of these in so long you are beginning to believe it is merely an old wives tale....hang tight, as it will happen again and when it does-your heart will sing!
Walk with me down this memory lane, if you please. Mother is seated and poised to vocalize this story to a boy who not only will be interested in the subject matter, but most likely will "eat it up" due to the boy theme, gun toting and adventure loving moments. She calls said student over to hear this enrapturing story (OK, I may be stretching it but hey I can peal out a story like a fine trained story weaver if need be~ and I needed to be spot on this day). Head Mistress waits and calls again-perhaps student's ears are full of wax and he simply didn't hear the request (even tho he was but a mere 15 ft away, in the same room). Request reverberates across the room, this time with a sternness that indicates punishment may soon follow, if not met quickly. Student bemoans the entire 15 ft walk to meeting place, asking "why" and "how long". Head Mistress is confused, after all of the books we have been reading of late (minus the Chronicles of Narnia) this one meets and exceeds this student's awesome factor list. Mother Mistress beckons child to her side and promises-just 3 chapters then.
image from amazon.com
First chapter brought mild interest, a bit of confusion until the page with the Matchlock gun is displayed. Hmm, he has seen those on historical shows/at museums. Interest peaks slightly. Mother moves to chapter 2...mind you in pure story telling splendor with voice inflections that would make a professional ooo and ahh in delight. Mother is pouring it on thicker than a chilled maple syrup. Suddenly, a student of despair speaks out (wiggly, distracted and just about to spring from his "imprisonment" if not released soon)..."Are we done yet?"
Guilt flashes over boy's face, "Forget it." is heard and mother says, "OK fine, just one more chapter. You will survive."
The third chapter begins to wind down, mother's voice growing dry and raw from the dramatic inflectional reading skills-she too wants this misery to end. Deflated and sad that that she somehow misread the student's love of such things, she looks at puppy dog eyed boy and says just a couple pages left. But here is where that moment occurs. The MOMENT educators across the globe yearn for....
But wait! What is this dear reader? Could it be?
Perhaps due to Mother Mistress's distress, she doesn't notice that the boy has snuggled deeper into her side, and that he genuinely has become "drawn into the story". Then Mother finishes last sentence in chapter 3.
About to shut the book, to go find some water and chocolate to drown her deflated self in-the boy loudly protests. DID you catch that dear reader? He asked, no begged, to have another chapter read. Trying to not alarm child with a major "WHOOHHHOOO", mother dear quickly records this event into her memory scrapbook, deep within her mind.
Then another chapter comes to an end and the request stands, with a flourishing, "Let's just finish it."
WHOA there. That is what we call the "moment", where the child begs for something they originally thought they had no need to hear/learn or partake in. Ah joy. He did like it [Mother isn't so off the target after all]-the fleshy desire to not want to "do school" because he had other intentions, was flipped over to "I want to hear it all."
Mother Dear and Student Once Protester melted into one cuddly, learning bundle of sweetness. Boy walks away having stated he really enjoyed the story, that he really liked the gun, and how the boy was able to fire it. And how scary it would be to do it, but he'd have been brave and done it. Ah. Ah and ah again.
These moments do exist and they do increase in frequency. Mother Mistress' mistake was to start the day way too late...and boy's mistake was to think he could balk his way out of a lesson. Fight for those moments dear reader, they are worth it.
And there is my great homeschooling moment of the week. It's been a good week indeed.
**and Mother did get that water to replenish her wasteland dry throat from reading the entire book, and that chocolate too.
Subscribe to:
Posts (Atom)