Monday, August 4, 2014

2014 Not-Back-To-School Blog Hop: Curriculum

nbts-blog-hop-calendar-2014
Don't forget to participate!  
I'd love to see what you have
chosen for your family!

Wow! It's already time to join the Not Back to School Blog Hop for this year! Frankly, we had a late ending to last year (uh-literally just finished the second week of July) so gearing back up at this point is almost too painful to contemplate! But hey, thanks for stopping by! If you are new to my blog I wanted to give you the 411 on us. We have been homeschooling for over 20 years and have graduated our first three [yep, we homeschooled high school too] and are currently winding down our adventures with our fourth child, who is at the 6/7th grade level.

We follow mostly a Charlotte Mason//Literature (with a tad of Montessori in there) method so our choices reflect those styles but we are also eclectic, so there are plenty of other little things thrown in for variety.

**I linked to where you can find out more about each product, but unless it is an Amazon link-I have no affiliation with the companies.  I just really like their stuff and thought I would share the best place I have found to get them. My best advice for anyone (especially newbies) is to buy used first, reserving new purchases for materials you cannot find that way.  Workbooks and any test booklets, etc. usually fall into that second category. Two great places for used books are Homeschool Classifieds and the Vegsource Homeschool site.   

2014 Curriculum Choices:

ART/MUSIC Study:
We will study:  van Gogh and maybe Seurat if we have time
                          no musician chosen yet

BIBLE:
God’s Great Covenant, New Testament Book One | Main photo (Cover)Who Am I? (And What Am I Doing Here?) Volume 2 | Main photo (Cover)
images from rainbowresource.com
I will either restart the God's Great Covenant Series: Book 1 NT I bought last year or get the second book in the Apologia series: Who Am I?  I dunno yet.  I am still trying to figure out this subject.  Again-I barely finished last year, so I haven't had time to contemplate it all and I had to put the God's Great Covenant series aside as it was just too much for him last year. This is on my "to figure out" list.


HISTORY:


5th Grade Homeschool CurriculumSonlight Eastern Hemisphere:  This is listed for about 5th grade.  I have done this 3x already and find many of the books to be above that level so this is a good fit for most 5-8th graders.  I usually try to fit this in between 6-7th grade.  I have a much older version but it works just fine. I will be covering just the history and some of the scheduled Bible from it.

Image from Sonlight.com

LANGUAGE ARTS/READING/SPELLING:
Our boy is dyslexic so he's a bit behind in the language/reading skills, so that is why some of this seems a bit lower than it should be for his age.  But that is the beauty of homeschooling-you tailor the education to the child not the other way around.
Learning Language Arts Through Literature Tan Student Book | Main photo (Cover)Phonics Road to Spelling & Reading Level 2 Curriculum Set | Main photo (Cover)

Learning Language Arts Through Literature Tan Book for the main backbone. A few times per week we do the Phonics Road to Spelling and Reading Level 2 that we started early last spring. I got this used at half price through homeschoolclassifieds. We are also reviewing the All About Spelling materials I have just as an added boost.  The LLATL has some spelling but dyslexics struggle with that so I try a bunch of different things to work through this subject with him.  I will have to do a separate post on that.

Winston Grammar | Main photo (Cover)Italic Handwriting Book G 4th Edition | Main photo (Cover)

Winston Grammar: level 1.  I ran out of time to do this last year with him, so this year we'll get moving on this.
Literature books for history, those assigned from LLATL and misc. stories cover his reading. I have this from previous students, so I only need the workbook.  I also have the second level so if he flies thru this, we'll do that as well.

Handwriting is easy-he's just finishing his last Italic HW book he started in the late spring.

images from rainbowresource.com

Geography:

Geography Study Guide rev | Main photo (Cover)
Mapping the World By Heart Curriculum w/ Maps | Main photo (Cover)We are covering world geography this year.  I have a whole area set up in our classroom just for this. We will do this more Montessori style using Continent Boxes (search Pinterest for ideas) and will add in Mapping the World by Heart (I have a very old guide but again-it'll do).  I may throw in a couple other books to guide us through this but haven't determined what ones I want.  I will write a post just on our geography once I get that all worked out.  But you can see the few posts I have on our Geography box and our Geography Board for more info.  We also need to do the last book, Minn of the Mississippi in the Beautiful Feet Books Geography series. We'll tackle that alongside the world geography about once or twice a week until done.

image from Rainbowresource.com

MATH:

Saxon Math 7/6 4ED Homeschool KIT | Main photo (Cover)Saxon 76.  I am looking at some of the Fred books (we have the Algebra one) like the fractions and such to add in for fun and for a good review.  I will try to borrow those tho, not buy them.  Otherwise, it's all Saxon.
image from rainbowresource.com
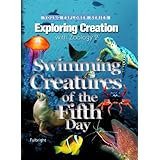

SCIENCE:

This is a new study for us and we're pretty excited about it.

Archaeology Book, Geology Book, and Intro to Archaeology & Geology Parent Lesson Planner Set | Main photo (Cover)Archaeology and Geology Pack

I am going to throw in a bunch of various hands-on stuff to really make this a fun study.  I have been picking up a few things from the dollar store, gathering goodies I already have about the home and will probably buy a kit or two like these: Dig! Discovery Kit: Maya Temple and Dig! Discover Kit: Easter Island

          Dig! Discover Maya TemplesDig! Discover Easter Island
archaeology/geology image from rainbowresource; kits images from amazon.com


FOREIGN LANGUAGE:  


Spanish for Children Primer A | Main photo (Cover)Latina Christiana Student Book I | Main photo (Cover)OK, every year I try to cover Latin and every year it gets waylaid.  Maybe this year.  I will do my best to work this in.  I want to get him going on Spanish too but with his reading/spelling issues-I simply have not been able to add those to our schedule.  So for now I will just say-if we do get to it I will dust off our Latina Christiana Series.  This looks for for Spanish-I do have an old version of Powerglide for it and we could use that but this looks more engaging....Spanish for Children Primer.  I will have to go thru the Blog Hop to see what other folks are using.  So this is another TBD subject. LOL.
images from rainbowreasource.com

Well that about covers it!  Thanks for stopping by and I hope I helped you find some neat things to use for your homeschool curriculum!


Thursday, July 24, 2014

Working on getting the Continent Boxes filled and finished Montessori Geography Box top

I am moving really slow this summer, but alas-I did [FINALLY] get the top of the geography box completed-which only took a year to do, LOL.  I have been hunting for some type of paper that had all/most of the world on it to decoupage on to it.  I was elated to find a sheet of scrapbook paper at Hobby Lobby this past week.  So today-I finally finished the thing!  I am pleased with the results.  All I have left to do is buy some Velcro dots to adhere the maps to (on the inside top) and print/laminate the maps.


I have also rearranged our classroom area, pared down lots of supplies and books and added a whole area for world geography.  I still have to take down the rain gutter shelves, patch the holes. I will then repaint the area so I can put up a nice world map and a smaller shelf from IKEA to hold the current continent books.  With all the activities around here, it has been hard to get time to truly devote to wrapping this up.  My hope is to not only have it done in time for the Not-Back-To-School blog hop but to also get it done soon so I can do a video tour of our room. I truly enjoyed watching a few videos of other homeschool rooms, so I hope to do one too.

I also have lots of busy work to do for the different Continent Boxes and since we'll be starting with Australia, I am searching and purchasing various things to add to it. I also have to buy, download, print and laminate a bunch of stuff for it as well.  Once I have a better handle on things I will be sure to post.  Until then, thought I would just catch you up on my summer projects.

Tuesday, April 29, 2014

Swimming Creatures Ocean Box

So as promised, I have a few pics here of the start of our ocean box.  I used about 1/3-1/2 of a [Dollar Tree] blue tablecloth, instead of paper.  It looks wavy and watery and it'll do.  I snagged a box from the local grocery store (they were more than happy to unload it on me) to create the main frame of this ocean box project. And there was no out of pocket expense. Yeah.


The bottom of the ocean was suppose to be made from various kid-made stuff but hey, we had real sand, coral and all sorts of ocean things to use-so we went for the real look.  I just took clear packing tape, stuck two pieces together and then taped it on the sides and bottom of the box. This created a lip to keep the sand from spilling out and all over.


I guess as we move through each unit of study we will add various creatures to this.  Sounds like fun and I will post as we go.  Oh and don't you know, as soon as this was all set up-we had our first residence arrive (who will not stay) to await the addition of new creatures.

LOL....oh Sponge Bob...this isn't Bikini Bottom.  


Tuesday, April 22, 2014

Apologia Science: Swimming Creatures of the Fifth Day ideas

We are excited to start working through the Apologia Swimming Creatures (student text) study.  I put our sea critter decorations up, that I found [at the local Dollar Tree Store] last summer, and have patiently waited to use.  They are obviously out of proportion but they do add some whimsical-ness to our classroom.


Product DetailsWe are using the spiral bound notebook journal that compliments the study, just like we did with the Flying Creatures.  I decided to also add an ocean depths worksheet from the Deceptively Educational Blog, which is a fun activity to do.  You just need to grab a paint chip sheet with varying shades of blue (5 blocks) for the student to glue to the page.  I found one in my mass collection of paint chips that I picked up a few years ago before we painted the boys' room, so I am not sure exactly where I got it.  Just look in the paint section of the home improvement stores for some.

We haven't started the ocean box (yet) that is part of the hands-on part of the study-but once we get that going I will add pictures for you.  Objective number one is to procure a box from the local grocery store then the blue paper (but me thinks a blue table cloth from the dollar store will work even better) first.  Hopefully, I can get that done this week.

Anyhoo-that is where we are in our science now.


Wednesday, March 19, 2014

Montessori Geography/Continent Box -so excited to share our homemade version

So back in September I posted that I wanted to make a Montessori Geography box (I had seen an awesome example on Pinterest).  I found an old, smelly and 'in great need of care' silverware box [the type that many a bride received for her wedding which was quite popular in the 1950s-70s] that would be perfect for the project.  It was marked $2 or $3 but I talked it down to a whopping dollar bill! My goal for this project was to spend as little as possible and I actually managed to do just that as the total overall cost was under $10!


SO I had the box and I knew what I wanted to do with it-but it took many steps to accomplish. That was September remember?  Due to some health issues, then the holidays then tucking it aside to then finding it and saying, "OH yeah-need to finish this!"-it took longer to get done than it should have.  So to start, I had to allow for at least a month of 'freshening' to get rid of the musty smells. That meant ripping out the gross felt and little doodads that were meant to hold the silverware. That helped eliminate some stench-but then I had to scrap off (as best as possible) the ugly glue, then rub the wood down with bleach water, then place the box in the sun to further the process. At night I placed a bowl of water with bleach in it inside the box, closed the lid and let it continue working on degrossifying it. I learned that trick from Martha Stewart many years ago.
Yes, it was that gross!

When it was finally ready for the box compartments, I sent the hubby and son on a search and find mission.  Thankfully we live in a sub that still has construction going on and since my hubby has spoken to several of the building crews before about scrap wood, it was not a problem finding some luan wood for this. Frankly, with the layering of that wood I can say it was a pain to work with. So if you decide to do something similar-look for a piece of wood that is one solid sheet and not layered together due to it's inherent need to split.  Anyway, I decided how I wanted the boxes to be and ordered my cut pieces from my handyman hubby.  Due to the glue issue (that was under the felt) I had two pieces of luan cut to lay down over them to give me a fresh look. Then he cut a few strips to build the boxes.  That was the hard part. We do not have a mini-Norm Abram workshop about the homestead.  But we made due and I am quite pleased with the results.


After the liquid nails (glue used to adhere it) dried we were ready for paint (I did sand down the wood to avoid splinters) and after several coats it is complete.

I found scrapbook paper I liked (at Hobby Lobby) and just cut it to fit.  
I took slightly watered down white glue (poor man's Mod Podge) to adhere 
it to the top, then coated the entire top/outside with a thick layer to protect it.  

Furthermore, I also have to print and laminate the maps I want to go on the interior lid of the box. I will put little Velcro dots on it to allow for easy map changes, which means all maps will have the dots as well so they will adhere to the main lid area.  This is key to multi-use flexibility.  If I just slapped a pre-school/K level map onto it, I could not use it for a variety of things I have in mind. Especially since I am using this with an older elementary student (right now) but want to be able to use it for future younger students as well.  Oh, and we need to put a hinge on the backside of the lid. Since the original hinges are small, are at least 40+ years old and with the additional weight from the the luan, it needs that additional hinge support.  I highly recommend doing that as well if you make your own.


I did paint the box sections to match the Montessori color code for learning the continents.  I also included a box for Antarctica!  This is important because several countries have territorial claims to it.  I therefore made 8 sections. One for each continent and one for what I am calling the control box. That is where the collection of items to be sorted go.  I will do a separate post on different things that I hope to do with our box as soon as I get all that done.  One step at a time-LOL.

Example using stamp cards for different continents.  Antarctica is not shown b/cuz I have not received the stamps yet but you get the general idea.  The map that would be used would be the general color-coded continent map for Montessori.  I will link all the sources in the post about how to use the box once I have that completed. 


Sunday, February 2, 2014

Nature Study: Goldenrods

A fun late summer time nature study activity. 
*Be aware of insects that are attracted to these. 
I think I remember seeing lots and lots wasps around them. 
When we started our study [we were going to do this for our co-op group lesson but the day was cancelled so my kids and I did this activity alone], we did some research and read through the story the On One Flower by Anthony D. Fredericks [got thru the library]. It is geared for pre-K through about 3rd grade level but it has great artwork and is a good intro book, so it should it work for most situations. I actually didn't find too many stories relating directly to the Goldenrod-so this was the best I could do.  We then moved to the Handbook of Nature Study by Anna Botsford Comstock.  We read pages 503-506 and did lesson 132 noted in this section.

Essentials:  Tool kit [they each have their own-I just took a pic with one] with all the goodies: magnifying glasses, paints, pencils, tweezers, erasers, and so on. It was early Oct. when we did this so the flowers were moving into the end of their season,so there were not many fresh and full flowering Goldenrod to collect.  But we only need two-so we were happy with that and put them into the flower press to have for their notebook page.

The kids' field study sheets. 

You can see the obvious difference between a 10 yr old and a 17 yr old's work.  I do not require the younger kids to get too detailed, unless they choose to do so.  They both still had to add the Latin names, and the boy needed to add a poem to his page when I took this picture but it gives you an idea of what you should aim for.  Once they had added some color to their flower and had done the other noted things, they went into their Nature Study binders.  I also brought along my camera to take some nice color pictures.  You could also just print a few pics and have your child glue those into their notebook page. This is a great option for children with low frustration thresholds or for those who are young/have dexterity issues.

Goldenrod in the field


look at that ugly bug!  

Nature study: Rocks and Gems

Please Note: I have updated this post that originally was posted on my Charlotte Mason blog.

A year back we used the Considering God's Creation program for my son's science. When we covered the Rocks and Gems section, I used the following books and resources to cover this unit.

So in true CM fashion, we set up an area for displaying our rock collection.  It was very easy to get a collection going [we live in a sub that was built on an old gravel pit so the rocks are literally everywhere] which was fun to display. The egg carton [I switched to the clear egg cartons so we could label them and still see what we had] served as a nice tote for the rocks which kept them organized and in one place.

 *all books are from the library, and you need a big variety due to there being so many rocks-the cross reference is necessary. Unless you have a geologist/petrologist in the family. The elephant carving was a gift  :) but that is soapstone, so it counts.
There are only a couple of these pages from the Considering God's Creation student workbook. I made copies [permissible as noted in the front of the guide] as I wanted the boy to do quite a few pages to document more of the rocks we found.

Wednesday, January 29, 2014

Chronicles of Narnia study helps

File:Narnian.world.map.jpg
from Wikipedia

The Chronicles of Narnia are pure excellence. Not only do they qualify under Charlotte Mason's idea for living books, they are the epitome of a well-written story that envelopes the listeners (and the reader I might add) drawing them in with ease. That is what I strive to provide for my children. A love of a story and the eagerness to listen to it unfold as they are drawn to it and ask for "one more chapter" to be read.

Product Details
Complete Chronicles of Narnia

Following CM's ways, I would ask the children to tell me what they remembered. Then I added some copywork and (at times) some lapbook mini-book snippets. After we read the stories we also watched as many movies as we could find (yes, even the older versions that are a bit lame but still useful).

Product Details
Everything Guide to Narnia

Product Details
Complete Idiot's Guide to Narnia
                          
Companion to Narnia, Revised Edition: A Complete Guide to the Magical World of C.S. Lewis's The Chronicles of Narnia
Companion to Narnia
images from amazon.com

Lapbook Links:

The Horse and His Boy via Homeschool Share
The Magician's Nephew lapbook via Homeschool Share
The Lion, the Witch and the Wardrobe lapbook via Homeschool Share

Miscellaneous links:


Nature Study notebooking helps and examples

Providing a good nature study foundation for your student, is one of the most rewarding aspects of Charlotte Mason.

How to go about it:

You can start out simply enough by just focusing on reading books about a certain subject. That will provide a nice springboard to stir up some interest. Slowly add in an afternoon stroll around your yard, neighborhood, or a local park-of course this depends on the season.  Take note of the type of birds, trees, animals and plants you see.  Even if that is simply mental notes or a couple pictures.  Then when you get home, look up the finds (via the internet, books) and discuss them.

After a few times of this, it can easily grow into a more organized, detailed study.  Use the resources available to you. Remember, you do not need to reinvent the wheel to do this! There are plenty of creative and handy folks who have pulled together studies, books and all sorts of ideas to get you on your nature study path.

Now when those moments arise when you simply are befuddled about what something is or what it does, be sure to admit to your students.  You do not need to be a walking encyclopedia on all things nature like.  AND you don't have to be artistically inclined to do nature studies or the notebooking aspect. The true object to refine your observation skills, to truly see the Glory of our Heavenly Father. It is not about how well you can sketch.  If you feel you and your students need some art instruction, by all means-add it.  There are plenty of "how to" books available.  Try your library first, go through their collection and only purchase the ones that best fit your family.  It takes time, but the results are life changing.

Some examples of NS books


Copywork and art project from Spears Art Studio-High School Curriculum


Sketches by teen-still life and pine cone study/leaf study


The boy's sketches using Barb's
Nature Study with the Outdoor Hour Challenges pages

Additional Helps:

One can add many different forms to their 3-Ring Binder, using a variety of sources, notebook pages and ideas.  I find this method works great because a child can add, shift around projects as they build their collection,  and even categorize their works. I use the Handbook of Nature Study by Anna Comstock a lot.  Barb's studies tie directly into this book, and are easy to implement. I find quotes from the Bible various other sources.

Having a good supply of paper, colored/drawing pencils, erasers, crayons, watercolor paints, scissors (for snipping specimens), and any other medium you can use to sketch, or capture your NS moments is a great way to stay "ready".  We keep our goodies in plastic, snapped totes so we can take them with us while we travel, do specific studies, and so forth.  Don't forget tweezers, variety of magnifying glasses, bug catchers, and a butterfly net to help you corral your findings, so you can sketch them too.

Helpful Links:


Keeping track of your eBook Lapbooks and Lapbook kits: Organization idea

One of the biggest issues I have with all my eBook Lapbook downloads, as well as the actual lapbook kits I own, is that I almost always forget I have them!  Why? Because most of them are eBooks so they are not visually in front of me unless I tap into my files on my computer. I grew tired of missing opportunities to use the components because I simply forgot about them. So I simply took a screen shot of the covers, then put about 4 per page (in MS Word) to print them.  I had some clear, 4 pocket sheet protectors so I sized the covers to match those dimensions. You could prob'ly even use a 6-8 pocket page by simply shrinking the cover size to fit.  Then I placed them into a 3-Ring binder.  So now when I need to see what I have in my inventory, all I have to do is pull the binder out and take a look.  Simple but extremely useful!


Tuesday, January 28, 2014

Examples of notebooking using blank books

Here are some examples of our John James Audubon notebook we put together when we covered him. Obviously, you can substitute this for any artist, musician or person of interest. I simply created a cover for the blank book I had purchased for this very activity.  I believe I got these from Bear Books, but you can also find blank books at Miller Pads and Paper.


These images were found at Wikipedia 
Not sure if the one on the right was-cannot recall now

These pages were from an Audubon notebook/lapbook package. I am not sure where I found that either but when I come across that source, I will be sure to post it.


These pages were put into a larger blank book from Pear Educational Products (site currently needs to be fixed-it links to the wrong place). Since most of the pages were printed, we simply glued them down on the pages. Some children would enjoy coloring on the direct pages or adding stickers too.  With them being blank, it allows for so many options to truly personalize them.

**for specific J.J. Audubon ideas see my post on that here.

Idea for storing pre-printed and pre-cut lapbook components

My friend gave me her stash of Creative Memories binder holders-these have a fold over of plastic to keep the goodies in the "envelope" part, and they have the 3 ring holes for a binder.  These make excellent holders for lapbook components.

To be ready for the part of the lesson I simply print out what I need to for our current study, cut them out (it's just easier that way) and store them there, pull out what we need per lesson and pop them back into another one when done, so we won't lose any of them.  Neat heh?  Only problem is I am not sure these particular holders are still available but I bet you can find something similar.  I will see if my research comes up with any good substitute, but check with your local CM associate or look for them at garage sales and such.  These are a little gem of goodness-

So the one on the right holds all the pre-cut and ready to work on components. Then I pull out some we'll be working on (laying on top of the pockets) and when those are done-we place them in another to await being placed in a lapbook.

                                  Ideas for a more detailed way to organize:
(this was penned prior to the clear pocket option noted above-
but it'll still offer a few more ideas for you)


I found the easiest way to have all the necessary mini-books, and lapbook components ready to go was to download/print the various things I wanted to include. I then cut them out and stored them in a Ziplock bag, along with the book (if we own it). I also printed off any notes or important info that I felt I would need for the study and label the whole package accordingly.

I also stored them in a clear, medium-sized tub for easy access. It allowed me to quickly find it without having to stop to print, cut out or find additional resources. When I had to do those tasks while during the school time, it only served to disrupt our day or lead to my precious student losing interest.


Wednesday, January 22, 2014

History and Artist Study Resources: Lewis and Clark & George Catlin

As we are moving through the Beautiful Feet Books Westward Expansion guide, we have come to an exciting point-the Lewis and Clark Corps of Discovery expedition.  I have been waiting for this part for some time.  I want to really ingrain the significance and well-coolness of this part of our history, so I am slowing way down to bring in several more resources, a DVD, arts and crafts and a great Lewis and Clark game to bring it all together. I reserved what I could not find at our library (use that feature peeps-great way to save money on books you'll only use once or twice) and pulled what I had on our shelves. The required text, Of Courage Undaunted: Across the Continent with Lewis and Clark by James Daugherty is serving as the backbone of the study but is not pictured because I didn't have it from the library when I posted.

I own some of these (What's the Deal, the top two Lewis and Clark 
activity books and the coloring book in the center pile ) 
 the others are from the library

So while we wait to get that book, we will read thru many of the excellent books I did get.  I will use some of the art/crafts books to cherry pick a few activities to add a bit more excitement to this study as well.  We will also be notebooking pages as we move thru the lessons (working on those right now, but so far I do have the Louisiana Purchase map from Homeschool in the Woods Olde World Style World and US maps printed, which he colored in while listening to me read one of the books. He also has T. Jefferson, Lewis, Clark and Sacajawea pics to cut out and place on his pages to write down their data for his history notebook too.


Because we have already covered Audubon, we won't be studying him as denoted in the study. We will, however, be covering George Catlin who did paint various Native American tribes/chiefs and village life a few years after L and C had explored the vast territory.  I found some real gems in regard to the colored prints of his work. I will have the boy go thru and find about 6 different ones he wants to do for his picture study, then get them printed and mounted on card stock for ease of reference. As a part of the Charlotte Mason way of studying artists, we'll put together an artist info page on George too.
image from Amazon.com
Wow-the price of this has gone up-I did not pay that amt. 
Do some research and look for a better deal.

And because I find games to be a great way to bring interest into a study-we'll be playing the Lewis and Clark game I purchased at the beginning of the year.  Once we have wrapped up the study, I will post a new ditty on the links/resources we used.