Wednesday, January 29, 2014

Nature Study notebooking helps and examples

Providing a good nature study foundation for your student, is one of the most rewarding aspects of Charlotte Mason.

How to go about it:

You can start out simply enough by just focusing on reading books about a certain subject. That will provide a nice springboard to stir up some interest. Slowly add in an afternoon stroll around your yard, neighborhood, or a local park-of course this depends on the season.  Take note of the type of birds, trees, animals and plants you see.  Even if that is simply mental notes or a couple pictures.  Then when you get home, look up the finds (via the internet, books) and discuss them.

After a few times of this, it can easily grow into a more organized, detailed study.  Use the resources available to you. Remember, you do not need to reinvent the wheel to do this! There are plenty of creative and handy folks who have pulled together studies, books and all sorts of ideas to get you on your nature study path.

Now when those moments arise when you simply are befuddled about what something is or what it does, be sure to admit to your students.  You do not need to be a walking encyclopedia on all things nature like.  AND you don't have to be artistically inclined to do nature studies or the notebooking aspect. The true object to refine your observation skills, to truly see the Glory of our Heavenly Father. It is not about how well you can sketch.  If you feel you and your students need some art instruction, by all means-add it.  There are plenty of "how to" books available.  Try your library first, go through their collection and only purchase the ones that best fit your family.  It takes time, but the results are life changing.

Some examples of NS books


Copywork and art project from Spears Art Studio-High School Curriculum


Sketches by teen-still life and pine cone study/leaf study


The boy's sketches using Barb's
Nature Study with the Outdoor Hour Challenges pages

Additional Helps:

One can add many different forms to their 3-Ring Binder, using a variety of sources, notebook pages and ideas.  I find this method works great because a child can add, shift around projects as they build their collection,  and even categorize their works. I use the Handbook of Nature Study by Anna Comstock a lot.  Barb's studies tie directly into this book, and are easy to implement. I find quotes from the Bible various other sources.

Having a good supply of paper, colored/drawing pencils, erasers, crayons, watercolor paints, scissors (for snipping specimens), and any other medium you can use to sketch, or capture your NS moments is a great way to stay "ready".  We keep our goodies in plastic, snapped totes so we can take them with us while we travel, do specific studies, and so forth.  Don't forget tweezers, variety of magnifying glasses, bug catchers, and a butterfly net to help you corral your findings, so you can sketch them too.

Helpful Links:


Keeping track of your eBook Lapbooks and Lapbook kits: Organization idea

One of the biggest issues I have with all my eBook Lapbook downloads, as well as the actual lapbook kits I own, is that I almost always forget I have them!  Why? Because most of them are eBooks so they are not visually in front of me unless I tap into my files on my computer. I grew tired of missing opportunities to use the components because I simply forgot about them. So I simply took a screen shot of the covers, then put about 4 per page (in MS Word) to print them.  I had some clear, 4 pocket sheet protectors so I sized the covers to match those dimensions. You could prob'ly even use a 6-8 pocket page by simply shrinking the cover size to fit.  Then I placed them into a 3-Ring binder.  So now when I need to see what I have in my inventory, all I have to do is pull the binder out and take a look.  Simple but extremely useful!


Tuesday, January 28, 2014

Examples of notebooking using blank books

Here are some examples of our John James Audubon notebook we put together when we covered him. Obviously, you can substitute this for any artist, musician or person of interest. I simply created a cover for the blank book I had purchased for this very activity.  I believe I got these from Bear Books, but you can also find blank books at Miller Pads and Paper.


These images were found at Wikipedia 
Not sure if the one on the right was-cannot recall now

These pages were from an Audubon notebook/lapbook package. I am not sure where I found that either but when I come across that source, I will be sure to post it.


These pages were put into a larger blank book from Pear Educational Products (site currently needs to be fixed-it links to the wrong place). Since most of the pages were printed, we simply glued them down on the pages. Some children would enjoy coloring on the direct pages or adding stickers too.  With them being blank, it allows for so many options to truly personalize them.

**for specific J.J. Audubon ideas see my post on that here.

Idea for storing pre-printed and pre-cut lapbook components

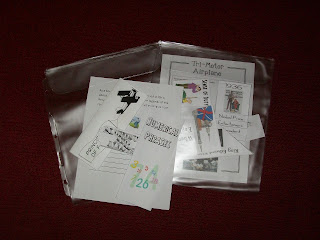
My friend gave me her stash of Creative Memories binder holders-these have a fold over of plastic to keep the goodies in the "envelope" part, and they have the 3 ring holes for a binder.  These make excellent holders for lapbook components.

To be ready for the part of the lesson I simply print out what I need to for our current study, cut them out (it's just easier that way) and store them there, pull out what we need per lesson and pop them back into another one when done, so we won't lose any of them.  Neat heh?  Only problem is I am not sure these particular holders are still available but I bet you can find something similar.  I will see if my research comes up with any good substitute, but check with your local CM associate or look for them at garage sales and such.  These are a little gem of goodness-

So the one on the right holds all the pre-cut and ready to work on components. Then I pull out some we'll be working on (laying on top of the pockets) and when those are done-we place them in another to await being placed in a lapbook.

                                  Ideas for a more detailed way to organize:
(this was penned prior to the clear pocket option noted above-
but it'll still offer a few more ideas for you)


I found the easiest way to have all the necessary mini-books, and lapbook components ready to go was to download/print the various things I wanted to include. I then cut them out and stored them in a Ziplock bag, along with the book (if we own it). I also printed off any notes or important info that I felt I would need for the study and label the whole package accordingly.

I also stored them in a clear, medium-sized tub for easy access. It allowed me to quickly find it without having to stop to print, cut out or find additional resources. When I had to do those tasks while during the school time, it only served to disrupt our day or lead to my precious student losing interest.


Wednesday, January 22, 2014

History and Artist Study Resources: Lewis and Clark & George Catlin

As we are moving through the Beautiful Feet Books Westward Expansion guide, we have come to an exciting point-the Lewis and Clark Corps of Discovery expedition.  I have been waiting for this part for some time.  I want to really ingrain the significance and well-coolness of this part of our history, so I am slowing way down to bring in several more resources, a DVD, arts and crafts and a great Lewis and Clark game to bring it all together. I reserved what I could not find at our library (use that feature peeps-great way to save money on books you'll only use once or twice) and pulled what I had on our shelves. The required text, Of Courage Undaunted: Across the Continent with Lewis and Clark by James Daugherty is serving as the backbone of the study but is not pictured because I didn't have it from the library when I posted.

I own some of these (What's the Deal, the top two Lewis and Clark 
activity books and the coloring book in the center pile ) 
 the others are from the library

So while we wait to get that book, we will read thru many of the excellent books I did get.  I will use some of the art/crafts books to cherry pick a few activities to add a bit more excitement to this study as well.  We will also be notebooking pages as we move thru the lessons (working on those right now, but so far I do have the Louisiana Purchase map from Homeschool in the Woods Olde World Style World and US maps printed, which he colored in while listening to me read one of the books. He also has T. Jefferson, Lewis, Clark and Sacajawea pics to cut out and place on his pages to write down their data for his history notebook too.


Because we have already covered Audubon, we won't be studying him as denoted in the study. We will, however, be covering George Catlin who did paint various Native American tribes/chiefs and village life a few years after L and C had explored the vast territory.  I found some real gems in regard to the colored prints of his work. I will have the boy go thru and find about 6 different ones he wants to do for his picture study, then get them printed and mounted on card stock for ease of reference. As a part of the Charlotte Mason way of studying artists, we'll put together an artist info page on George too.
image from Amazon.com
Wow-the price of this has gone up-I did not pay that amt. 
Do some research and look for a better deal.

And because I find games to be a great way to bring interest into a study-we'll be playing the Lewis and Clark game I purchased at the beginning of the year.  Once we have wrapped up the study, I will post a new ditty on the links/resources we used.


Friday, January 10, 2014

Paddle to the Sea book/map study

I bumped this post up from 2009 (wow-that was eons ago!) since I will now be covering this book study with my youngest.  I will come back and add in any new things we use for idea helps for you but for now-here are some great links.


I found this thru the Charlotte Mason Blog Carnival-

Part one of Paddle to the Sea

A gal posted the You Tube link for the Paddle to the Sea movie. How fun is that?! I wish we had had this when I did the study with my daughter a couple years ago. It is broken into 3 parts (10 min. for first 2, about 8 for the last one) to enjoy. My son was mesmerized...and it was filmed in 1966-so there is nothing flashy about it!

This makes a great addition to your geography studies, esp. if you are doing Paddle to the Sea. And if you are looking for a great study guide for geography, I highly recommend the Beautiful Feet Geography Guide. It covers four of the classic Holling C. Holling books-Paddle to the Sea is one of em. BF Books has 4 great maps to go with the study and they make very nice keepsakes-I have done this with 3 of my 4 and when Buddy enters 4-5th grade, he'll do it as well.


In the right sidebar of You Tube, you will find the other 2 parts. Thanks to Established Work (can no longer find this blog-sorry) for posting this info.

Tuesday, December 3, 2013

Teaching Science: Apologia Flying Creatures of the Fifth Day Notebook


Apologia Textbook: Flying Creatures of the Fifth Day
Flying Creatures of the Fifth Day Notebooking Journal
images from Amazon.com. 
Usually I copy and create notebook pages to supplement our science but this year, knowing our schedule-I ended up purchasing the notebook that is specifically designed to complement the textbook.  It has been a God send!  I mean it.  I have found that I am no longer spending huge amounts of time searching for material or creating go-along pages/activities, and I don't need to come up with lapbook components either! Granted, some of the activities we have skipped (which is quite alright in my opinion) but for the most part has been a seamless way to further implant the lessons into the Boy's head.

Some page examples:


lapbook: flip book activity

The lapbook components (included in back of notebook to pull out to create as needed) are very colorful and nicely done.  Talk about saving cash on printing!  Whew. 

Anyhoo-we're truly enjoying this so far and I am super happy I bought the notebook to go along with the next text we'll be doing (Swimming Creatures of the Fifth Day).  I also greatly appreciate the little schedule that comes in the notebook.  It really helps me stay focused and keeps me accountable-which is always a good thing.  Not sure if you have tried these, but if you are debating them-like I did for a time-I strongly suggest giving them a try.  :)

Now I did not receive a thing for my opinion here-notta.  I bought these puppies and just wanted to share a good thing to my readers. But hey-Apologia, if you are reading this, I would love to write a review for another of your science notebooks/text after we're done with the Swimming Creatures one...cough, cough.  :)  


Monday, November 25, 2013

Beautiful Feet Books: Geography Maps and Notebook ideas using the BFB Geo Thru Lit study

So this year we have gone back to our favorite study guides for history-Beautiful Feet Books (BFB)*. We are feeling so much better and enjoying this transition back to what we know and like. As an added bonus, I have pulled in the Beautiful Feet Books Geography Through Literature study [which my 3 previous kiddos did and loved] because it goes along, just about perfectly, with the California and Westward Expansion that we are covering this year..  Like amazingly.  :) Love when that happens!

We put his maps above our white board.  He was getting sloppy with his work on the second map-and admitted it.  Ah boys-my girls were meticulous and he is like 'whatever'.  LOL He also said he decided to go all 'colory' on it, after examining his older brother's and sisters' maps (yep, still have em) and stating that he chose to go wild while they did theirs all nice like (paraphrase of his comment-let me tell you he had me in stitches laughing about his decision). 

Because there are four books used in the Geo study-all Holling C. Holling books-I decided to divide the year into 2 books per semester.  Since we started out with the expansion/exploration of sea faring brave-hearts, we began with Seabird.  This is actually one of my favorite H.C.H. stories. The boy especially enjoyed it because it was all about sailing and man stuff. The kind of man stories that inspire young lads to dream of heading out to horizons unknown. We also did notebooking [per the instructions in the guide plus a bit of our own] pages on it. And if that wasn't enough of a tie in, since it's about a bird (for the most part) it actually melded seamlessly with our Apologia Flying Creatures of the Fifth Day program!  [The first couple chapters are all about birds-so yeah!!! Talk about getting more bang for the buck!]

I found this pic of a seagull coloring page, and then had him 
categorize the names like we did in our science lessons. 
The notebook is broken into the book sections. I 
simply photocopied the cover for the title page, 
to make my life easier. 
Obviously you could just have the student
write the name of it on paper. 

Then we moved to Tree in the Trail.  My favorite of the four in this study.  Since both the California and the Westward Expansion talk about the movement from east to west in our US history-it was a  no brainer of a choice for our next map. Again, we did notebooking as well.  Plus, here again-our Little House on the Prairie study fit nicely too (they didn't do the Santa Fe Trail but they did move via wagon and such) which is part of our literature and LLATL study. We have read the first book of hers and the Almanzo book (Farmer Boy) so far.  We'll keep on with the series per my grand overall plan for our lit studies. Not to mention they will only further blend into our overall history study for the year.

These pics are from Edwin Tunis's Frontier Living Book-
this is out of print, I own it.
Again, we just copied some pics cuz he doesn't like 
drawing and well, again-it's easier. I don't usually
push photocopying pages but there are times, and since this
is for educational purposes and not being sold-
it falls into that gray area.

And there you have it. We'll be done with this semester pretty soon and I have to say, this time around has been so much more enjoyable and refreshing.  I will post more about our Apologia experience and other thoughts soon.


*I am not an affiliate for BFBooks but boy I should be-I truly love this curriculum. It is literature based,  we can cover as much or as little as we wish,  and at our pace. It has activities/notebooking that are easy to do and (at least right now) it is beautifully tying into many of our other subjects!  So anyhoo-this is my own personal take on it and no, I didn't get paid or receive anything for it.  


Saturday, October 12, 2013

Couponing Tips 2: updated binder storage for printed coupons and what I do with the leftover ones

So my printed coupons have grown. My original idea worked pretty swell but I needed a bit more division and organization.  So when I saw some binders and tabs and little pockets marked 1/2 off in the school clearance section of my local CVS-I grabbed what I could. This is what I came up with, mind you-everyone has their own style of keeping their coupons, and this seems to work best for me. It may be too cumbersome for you or simply not your style-so be sure to search the web and the great couponing sites for more ideas.

I put together three binders. Two for regular products (divided into sections based on the isles at the store I shop at the most) and one for organic stuff.  I also took the tabs and duct taped the old ones to the new ones (Spider Man theme there, hey that was like 80% off so why not? Saving is important ya know) to bump the tabs out far enough to be equal the coupon holding sheets. Yes, it hangs out over the edge but I don't mind.  It doesn't look all nice and tidy-but it was not spency to build. And I am all for not putting out extra cash for this project.


My goal is to get the organic book the sheets I have in the other ones, but for now these pocket things will do. I added a piece of card stock to divide up the pocket to give me two sides, just like in the horizontal clear pockets in the other binders.  It works. I also took 3 of the pockets and folded the top corner down to make an envelope tucked edge for the three stores I get the most Catalinas from...Meijer, Kroger and CVS.


That way they don't go flying all about when I open it or pull the binder in and out of the bag I carry these in. Oh, and now I finally have a bag that I can carry all the binders in when I go shopping too!  Got it for free using my points the Kelloggs Rewards program. I guess it is sorta free-after all I had to buy Kelloggs products to earn points to get it-but hey, we ate, we enjoyed and now I have a cute Toucan Sam bag to hold it all.


This bag goes with me to the store, even tho the green one will already have my lists/coupons for that store already organized in (pencil) pouches.  Rarely will I go into a store without this.  If I see something I can score a great deal on and I 'forgot' the bag in the car-I will go back out and get it.  Otherwise, if it is at home and I have made a 'quick' stop for something-I will jot a note about it, then go back next time I pass the store to get the products.  But yes-this puppy is my baby and it shops with me. I will pull out and find additional coupons for non-advertised items and clearance goodies. I have walked out the stores with some 'almost paid nothing for' items by having this with me! Love when that happens!

And if you are curious what I do with all the coupons I get each Sunday-well, I go thru each one (piling up and matching pages from the individual flyers) cutting out only those coupons I know that I know we will use or will even consider. Then I put all the same pages together, tuck them into the outer fold of each flyer (Red Plum, Smart Source and Proctor and Gamble) then pen the date on the top outside cover, and put into large Ziplock bags by months.

When I am doing my lists/pulling matching coupons prior to shopping (by going thru several couponing sites to see store match ups) I may decide to purchase something that I did not cut the coupon for. All I do then is find the correct month packet and go to the listed flyer and grab the coupon(s). This extra coupon thing can get pretty bulky and heavy-so it stays at home. I do all my planning before walking out the door-so I rarely have one of those, "Shucks! I don't have that coupon on me!" moments.  If I do spot something I know I have a coupon for at home-I jot down the store name, item and then can go home and pull it for another time that I may be going by the store.

And that is the basic way I store and use my coupons.

Friday, August 30, 2013

Creating Activity/Trinket Boxes out of Food Boxes (like for Montessori works) [cross-post from my What's in the Box? blog]

So what does one do with all those little pieces or parts that are a must when using Montessori works [aka: a specific activity meant to teach something], or some matching activity or whatever it is you have that will need to be contained?  What can you use that keeps them all nice and tidy and looks good too? 

Well, being frugal is always a great way to start. So you search your humble abode, and perhaps even ask friends/family for those particular boxes that once housed delicate chocolates or sugar packs. Then you scrounge thru your various scrapbooking paper, collect glue, scissors, a bowl and a brush and you get busy. And that is exactly what I have done lately.  Whenever we get (usually a gift) those nice quality chocolates, I always save the boxes.  My husband actually found one I tucked away and he had the nerve to pitch it.  I gasped in horror and immediately plucked it from its demise.  Thankfully there wasn't anything in the trash yet so it was safe from grossness, and I must say-he won't make that mistake again. The shocked look [from such outlandishness across my face] surely left a lasting impression on him. LOL

Anyhoo-the reason I am posting this because there are times folks need a box or something to hold those little goodies. So why pay a lot of cashola for something you can make?  I don't know why you would.  I try my best re-purpose things when I can; this is a fun, creative way to get a few storage boxes that are sturdy and useful for our schooling needs.


Now I do not have a canister of Modge Podge about the house, so I did what any frugal gal would-I made the 'poor man's version' of it using Elmer's Glue and water to thin it.  Worked like a charm!
Figured I would just do a picture tutorial (for those who have never tried such things) and put a wee comment under when necessary.  Hope this helps you out.


The Basics:
Find a piece of scrapbook paper that appeals to you. I recommend using the thinner style. Then figure out there the lid fits best-allowing for enough paper to cover up over the sides and slightly over into the inside edge.
 Cut to the area where the corners meet
-but not too far in as you can always fix as you go.
 Put a nice, but not too heavy layer of glue down on the
 lid then lay down in the center area of your paper.
 Flip over and use one of those handy-dandy Pampered Chef  
scrapers (or a soft edged tool) to get rid of any air bubbles.

 Glue, fold and press out any bubbles, along all sides.

 Trim off any excess and tuck the corners in nicely.  Try not to over do it on the inside because the extra bulk may prevent the lid from going over the bottom.
Coat the entire top/sides with thin layer of glue.
Let dry thoroughly. I actually did two coats.  
Very smooth and durable.

And there ya go-


Now I have a lovely box to contain language materials.  And hey, if it gets crushed-well I am out like 30 cents.  Not too shabby!  :)

Monday, August 26, 2013

Just updated the Not Back to School post on the classroom but here's the Reader's Digest version

Here is the newly set up nature study table/art picture study and focal book area.  I have wanted to do this for a long time and was able to get that accomplished today. The other side of the room-well not so much but will finish that this week. (UPDATE:  this has since been removed and our geography center now takes up this area)

I literally just did a treasure hunt about the house to find doo-dads and some display things to pull this together.  Robbed a few of my decorations in the kitchen and such and then added the Safari Ltd. toob birds (backyard and a couple from the exotic b/cuz we have hummingbirds and owls around us)...added the labels so he can start remembering them.  Will have my pop scour his yard for various bird feathers (he has like a sanctuary or something in his back yard-the birds and critters know where to go for food) and those will go in a flatter basket (need to purchase) so he can check those out when we are covering birds in science (which will be right off the bat). I can add/delete as necessary and change the items per season.

 The workboxes used to be under the rain gutter book holders,
 now it displays our current studies 
and future study items 
(cannot wait to start the Laura Ingalls stuff!!!!)
 A necessity is the Mrs. Sharp's Family Traditions book! 
[Left hand corner of table] LOVE IT!
And I taped up the picture study cards I had
from when we first covered Audubon.  We'll
cover him again this year but will spend more time on 
his animal drawings for that.
 This little wood armoire is my dd's. She used it when she 
played with her American Girl Dolls-LOL
  Was just sitting in storage so had to use it.
My goal is to get a nice apothecary cabinet or 
discover chest cabinet to keep all the little fun nature things
in.  Maybe next year's budget will allow for it but for now-
just using what we have around here.